React componentDidMount example and tutorial.
What is the proper way of using componentDidMount() and how to fetch data efficiently without rerendering our component.

When we begin with react we encounter a question on how to correctly fetch data and what component lifecycle method is correct for this task.
Quick references for intermediate developers
componentDidMount()runs after the initial render only once and multiple times if key prop changes.- This is the great hook to run to fetch data when a component mounts
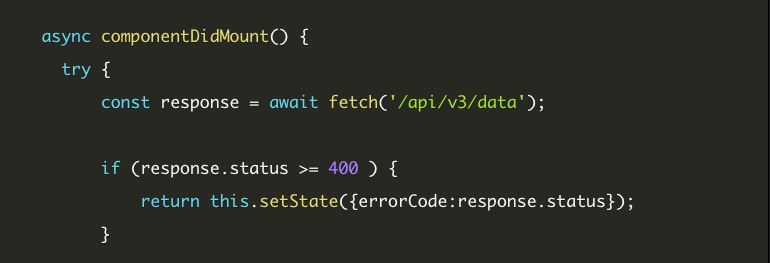
- It’s safe to use async/await on
componentDidMount()hook
componentDidMount() is invoked immediately after a component is mounted (inserted into the tree). Initialization that requires DOM nodes should go here. If you need to load data from a remote endpoint, this is a good place to instantiate the network request.
Below we can see the most basic componentDidMount example of method declaration in our component.
class App extends React.Component {

  componentDidMount() {
    // code will run after the first render!
  }

  render() {
    return <h1>My Awesome React Component</h1>;
  }
}Now we are going to do some data fetch and declare state to store our fetched data or if we receive and error we can store it.
class App extends React.Component {

  state = {data:null,error:null}

  componentDidMount() {
    fetch('/api/v3/data').then(response=>response.json)
    	.then(data=> this.setState({data}))
        .catch(error => this.setState({error}))
  }

  render() {
  	const {error,data} = this.state
    if (error) {
    	return <h1>Fetch has Failed</h1>
    }
    if (data) {
		return <h1>Data has been fetched!!!</h1>;
	}
    return <h1>Fetching Data...</h1>;
  }
}It's important to handle errors in case your fetch failed to display proper UI/UX to the user.
Let's split what we did here to
- We declare a state to store our fetched data and we added error as well in order to respond to an error if we fail to fetch, so we could display proper user interface in case that happens
- We declare our
componentDidMount()and start fetching data from our imaginary API. - Inside our
componentDidMount()we are usingthis.setStatein order to save our data in case we succeed or if we catch an error we store an error. - Finally on our
render()method we return proper UI for each state and the default return is for our loading which is happening before we fetch or get an error.
I hope these blog post and example cover the knowledge you need to start working with componentDidMount() .
If you like to learn how to use async await with componentDidMount

Stay tuned fore more useful content.